Hello Friends! Now that I have done as much as I can do on my own with the kitchen makeover, I have decided to move on to the closet in the office. I say "office" but it is really a bedroom that I have been using as an office. I suppose that many of us have had to commandeer a space in our homes as an office space. Unfortunately, the shelf in the closet wasn't really meant to hold heavy office supplies such as reams of copy paper and client files. Over time, the brackets holding up the shelf had begun to tear away from the drywall.
The shelf itself, which was nothing more than a pressed melamine board, had also begun to bow in the middle. I don't know why I left it so long. I think I was a little intimidated at the thought of removing it. It is the second time I have had it repaired and the contractor who installed the current shelf had assured me that it was never going to rip out of the wall. Famous last words, right?
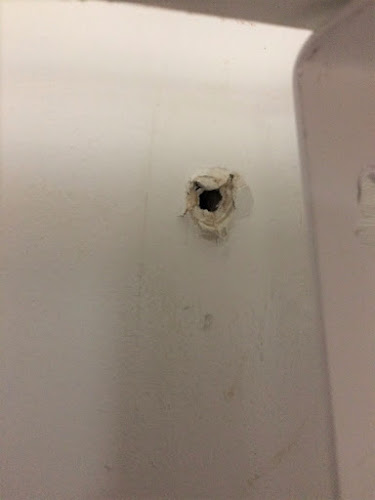
Funnily enough, taking everything down was a breeze! The screws and anchors had torn so far out of the wall that it wasn't difficult at all to dismantle. Unfortunately, when I took everything down, gaping holes were revealed. The holes went right to the other side of the drywall.
Can you believe that I remembered that I had the very things in my toolkit to effect the necessary repairs? Really, it was a bit like finding a spare can of paint in the exact right shade to paint out the blue stripe in my kitchen makeover which you can read about here.
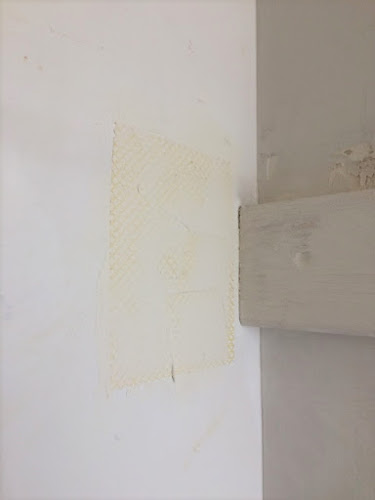
Yes, there is such a thing as a wall bandage! Basically, it is a self adhesive fiberglass mesh that you place over the hole which provides extra support. First I filled the hole with as much drywall compound as I could. Then I cut a generous sized square of the wall bandage and placed it over the hole.
I used a putty knife to trowel on the drywall compound.
If you can't find wall bandages then self-adhesive drywall joint tape is basically the same thing that comes in a roll instead of sheets.
I did find that the tape was much less sticky than the bandages so it didn't adhere to the wall as well.
Once the mesh has been completely covered by the drywall compound, sand it smooth. Repairing dry wall is a much more cost effective option than tearing it down and installing a new sheet of drywall. Also, it is something that you can do yourself that doesn't really require any specialized skill set. Now I can move on to the next phase which is planning drawers and shelves for the closet. It is a bit of a conundrum because I want drawers and shelves to hold office supplies but which can be repurposed down the road to hold clothes. Also there has to be some hanging space so that the closet can be used for hanging clothes later on if need be. I don't want to do what I did last time which was to put up another shelf and pole. I would love a closet that looked like it had custom built-ins in it similar to California Closets but that is not in the budget. Speaking of budget, the cost of the repairs was a big fat donut as I had everything I needed on hand. I can't wait to move on to the next phase. Stay tuned for that!


